寫在前面
在做項目的過程中,偶爾會轉牛角尖,比如感覺很喜歡 京東 淘寶 的上拉彈出層獲取商品屬性的效果,于是就各種尋求思路,最終實現并封裝成自己的類庫,LWPopupViewController。將需要使用彈出層的 UIViewController 繼承 LwPopupViewController 即可。簡單易用。
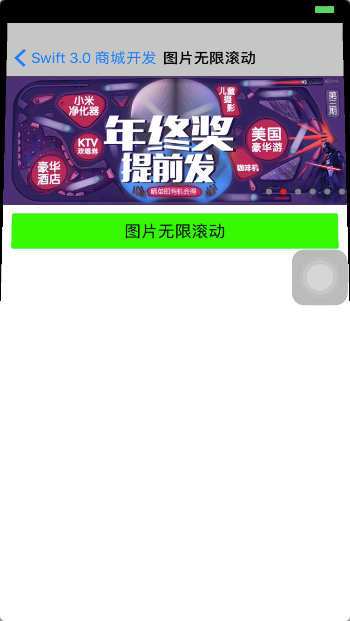
效果圖
我的項目效果圖

設計思路
其實看起來無處下手的功能,分析起來很簡單。
組件
- 首先此功能繼承于一個 ViewController,在其中定義兩個子視圖(maskView 和 popView)
- maskView 是這蓋層視圖,popView 是彈出層視圖。
原理
彈出過程:整個 ViewController 被縮放形成縮小狀態(具體動畫后續講解);將 maskView 添加到 主視圖(UIApplication.shared.keyWindow?)中,形成遮擋層。popView 添加到 主視圖(UIApplication.shared.keyWindow?)中并動態修改 frame 形成彈出動畫效果。
彈回過程:popView 通過修改 frame 在主視圖中隱藏后,隱藏 maskView,同時 主 ViewController 從縮放狀態回復到正常狀態,最后將 maskView 和 popView 從應用主視圖中移除。
具體實現
定義枚舉類型
巧用枚舉類型,將很大提高代碼的邏輯性
// 主視圖縮放 步驟
enum LWAnimateType {
    case first
    case second
}

// 彈出層操作事件
enum LWActionType {
    case popUp
    case popDown
}
定義控制器以及常規屬性
class LWPopController: UIViewController {

    // 主視圖控制器——視圖
    var rootView = UIView()
    // 遮擋層
    var maskView: UIView!
    // 彈出層視圖
    var popView:UIView!

    // 彈出層的高度 默認:400
    var popViewHeight:CGFloat = SCREEN_HEIGHT * 4 / 5

    // 動畫周期
    var duration: TimeInterval = 0.3

    // 具體實現代碼 在下面
}
初始化 maskView 和 popView
兩個核心組件
override func viewDidLoad() {
    super.viewDidLoad()
    if let selfNV = self.navigationController {
        rootView = selfNV.view
    } else {
        rootView = self.view
    }
    // 定義尺寸
    maskView = UIView(frame: CGRect(x: 0, y: 0, width: SCREEN_WIDTH, height: SCREEN_HEIGHT))
    // 定義背景色
    maskView.backgroundColor = UIColor.black
    // 定義透明度
    maskView.alpha = 0.2
    // 添加點擊事件
    let tapGesture = UITapGestureRecognizer(target: self, action: #selector(popDown))
    maskView.addGestureRecognizer(tapGesture)
    // 確保視圖不被當前 UIView 視圖遮擋
    maskView.layer.zPosition = CGFloat(INT8_MAX)
    // 定義尺寸
    popView = UIView(frame: CGRect(x: 0, y: SCREEN_HEIGHT, width: SCREEN_WIDTH, height: popViewHeight))
    /// 定義背景色
    popView.backgroundColor = UIColor.white
    /// 加個陰影
    popView.layer.shadowColor = UIColor.black.cgColor
    popView.layer.shadowOffset = CGSize(width: 0.5, height: 0.5)
    popView.layer.shadowOpacity = 0.8
    popView.layer.shadowRadius = 5
    // 確保視圖不被當前 UIView 視圖遮擋
    popView.layer.zPosition = CGFloat(INT8_MAX)
}
主視圖 3D 設計(核心內容)
如何實現 當前 UIViewController 縮放效果
// 動畫效果
fileprivate func transformAnimation(type: LWAnimateType) -> CATransform3D {
    var transform = CATransform3DIdentity
    switch type {
    case .first:
        // 視圖角度
        transform.m34 = -1.0 / 2000;
        // 尺寸縮小(transform對象,X軸,Y軸,Z軸)
        transform = CATransform3DScale(transform, 1, 1, 1)
        // 沿某軸旋轉(transform對象,旋轉角度,X軸,Y軸,Z軸)
        let angel = 15.0 * (CGFloat)(M_PI) / 180.0
        transform = CATransform3DRotate(transform, angel, 1, 0, 0)
    case .second:
        // 第二次 變形實在第一次的基礎上
        transform.m34 = transformAnimation(type: .first).m34
        // 沿著某軸移動(transform對象,X軸,Y軸,Z軸)
        transform = CATransform3DTranslate(transform, 0, 10, 0)
        // 尺寸縮小(transform對象,X軸,Y軸,Z軸)
        transform = CATransform3DScale(transform, (SCREEN_WIDTH-40)/SCREEN_WIDTH, (SCREEN_HEIGHT-20)/SCREEN_HEIGHT, 1)
    }
    return transform
}
分析:3D 縮放分兩步:
- 整個視圖先沿著 X 軸旋轉 15%;
- 整個視圖再 X軸 左右個縮小 20尺寸,Y軸縮小 10尺寸;

popView 設置 frame
除了 當前 UIViewController 縮放動畫,popView 也是需要彈出動畫
// 獲取 popView 和 maskView 新的 frame
func getViewFrame(type: LWActionType) -> CGRect {
    var frame:CGRect
    switch type {
    case .popUp:
        // popView 出現時的 frame
        frame = popView.frame
        frame.origin.y = SCREEN_HEIGHT - popViewHeight
    case .popDown:
        // popView 隱藏時的 frame
        frame = popView.frame
        frame.origin.y = SCREEN_HEIGHT
    }
    return frame
}
設計 彈出動畫與 彈回動畫
通過 iOS 自動動畫將 當前 UIViewController 縮放、maskView 遮擋以及popView 彈出結合起來
// 彈出視圖操作
func popUp() {
    // 分別將 maskView 和 popView 添加到 應用主視圖中,脫離與當前的 UIViewController 便于分離縮放動畫
    UIApplication.shared.keyWindow?.addSubview(maskView)
    UIApplication.shared.keyWindow?.addSubview(popView)
    UIApplication.shared.keyWindow?.bringSubview(toFront: maskView)
    UIApplication.shared.keyWindow?.bringSubview(toFront: popView)
    // 獲取最終的 popView 的彈出層位置尺寸,使用動畫實現彈出效果
    let popViewFrame = getViewFrame(type: .popUp)
    UIView.animate(withDuration: self.duration,
                   delay: 0,
                   options: UIViewAnimationOptions.curveEaseInOut,
                   animations: {
                    // 當前 UIViewController 縮放動畫一
                    self.rootView.layer.transform = self.transformAnimation(type: .first)
    }) { (bool) in
        UIView.animate(withDuration: self.duration, delay: 0, options: UIViewAnimationOptions.curveEaseInOut, animations: {
            // 當前 UIViewController 縮放動畫二
            self.rootView.layer.transform = self.transformAnimation(type: .second)
            self.popView.frame = popViewFrame
        }, completion: nil)
    }
}

// 彈回操作
func popDown() {
    self.maskView.removeFromSuperview()
    let popViewFrame = getViewFrame(type: .popDown)
    UIView.animate(withDuration: self.duration,
                   delay: 0,
                   options: UIViewAnimationOptions.curveEaseInOut,
                   animations: {
                    self.rootView.layer.transform = self.transformAnimation(type: .first)
    }) { (bool) in
        UIView.animate(withDuration: self.duration, delay: 0, options: UIViewAnimationOptions.curveEaseInOut, animations: {
            self.popView.frame = popViewFrame
            self.rootView.layer.transform = CATransform3DIdentity
        }, completion: {(bool) in
            self.popView.removeFromSuperview()
        })
    }
}
使用說明
其實我寫這個類,用起來還是比較方便的,只需要將需要彈出的UIVeiwController 繼承 LWPopViewController 即可,popView 將是父類屬性,只需要在其中 addSubView 即可使用,通過 self.popUp() 和 self.popDown() 調用彈出、彈回事件。
結合上一節的內容,簡單寫了一下調用代碼
class GoodsDetailController: LWPopController {


    var imageScrollView = ImageScrollView(frame: CGRect(x: 0, y: 0, width: SCREEN_WIDTH, height: 150))
    var data = [ImageScrollData]()

    override func viewDidLoad() {
        super.viewDidLoad()
        self.view.backgroundColor = UIColor.white
        edgesForExtendedLayout = .init(rawValue: 0)
        self.title = "圖片無限滾動"
        self.view.addSubview(imageScrollView)
        for i in 1 ... 6 {
            let item = ImageScrollData(imageUrl: "image_scroll_0\(i).jpg", imageDescribe: nil)
            data.append(item)
        }
        imageScrollView.data = data
        self.popView.backgroundColor = .red
        initView()
    }


    func initView() {
        self.edgesForExtendedLayout = .init(rawValue: 0)
        self.view.addSubview(btnPopup)
        btnPopup.frame = CGRect(x: 10, y: imageScrollView.bottomY + 10, width: SCREEN_WIDTH - 20, height: 40)
    }

    override func didReceiveMemoryWarning() {
        super.didReceiveMemoryWarning()
        // Dispose of any resources that can be recreated.
    }

    func showPop() {
        self.popUp()
    }

    func closePage() {
        self.dismiss(animated: true, completion: nil)
    }

    fileprivate var btnPopup: UIButton = {
        let object = UIButton()
        object.tag = 1
        object.layer.cornerRadius = 2
        object.backgroundColor = UIColor.green
        object.setTitle("圖片無限滾動", for: .normal)
        object.setTitleColor(UIColor.black, for: .normal)
        object.addTarget(self, action: #selector(showPop), for:
            .touchUpInside)
        return object
    }()

}
最終效果

